Example zoom-in  

Main Image

Main Image with zones

Detail zone 1

Detail zone 2

The above example shows one instance of how detail zones are given for an image. Note that the second image (showing boxes giving the zoomed-in portions) is just a visual aid for this example - it is not necessary to submit an image with boxes drawn on it, instead, you merely give the co-ordinates of the boxes (in this case the co-ordinates are 424,328 to 615,583 and 387,956 to 578,1211 inclusive).

A simple way to calculate the needed size is to use the knowledge that since we want 1/25th of the area, and area = w * h, we can take advantage of the fact that 25 is 5*5, and that therefore the width and height of the zoomed-in portion will both be exactly 1/5th of the original (e.g. 960 / 5 = 192 and 1280 / 5 = 256).

In the above example the location of the zoomed-in portions were chosen to be representative of the image. The whole picture was rendered at 4800 x 6400 and the details were simply selected and extracted using a graphics editing program.

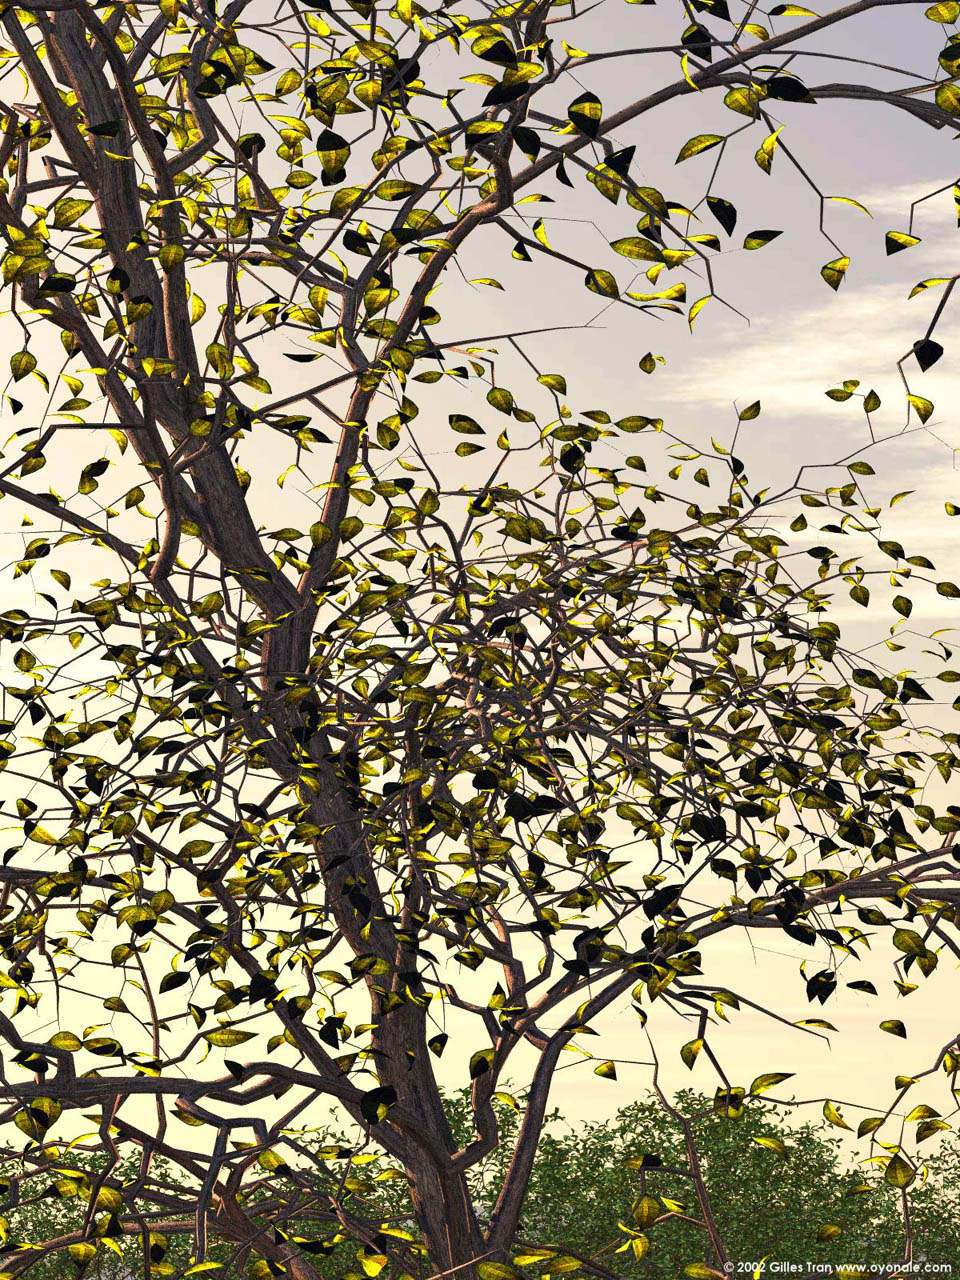
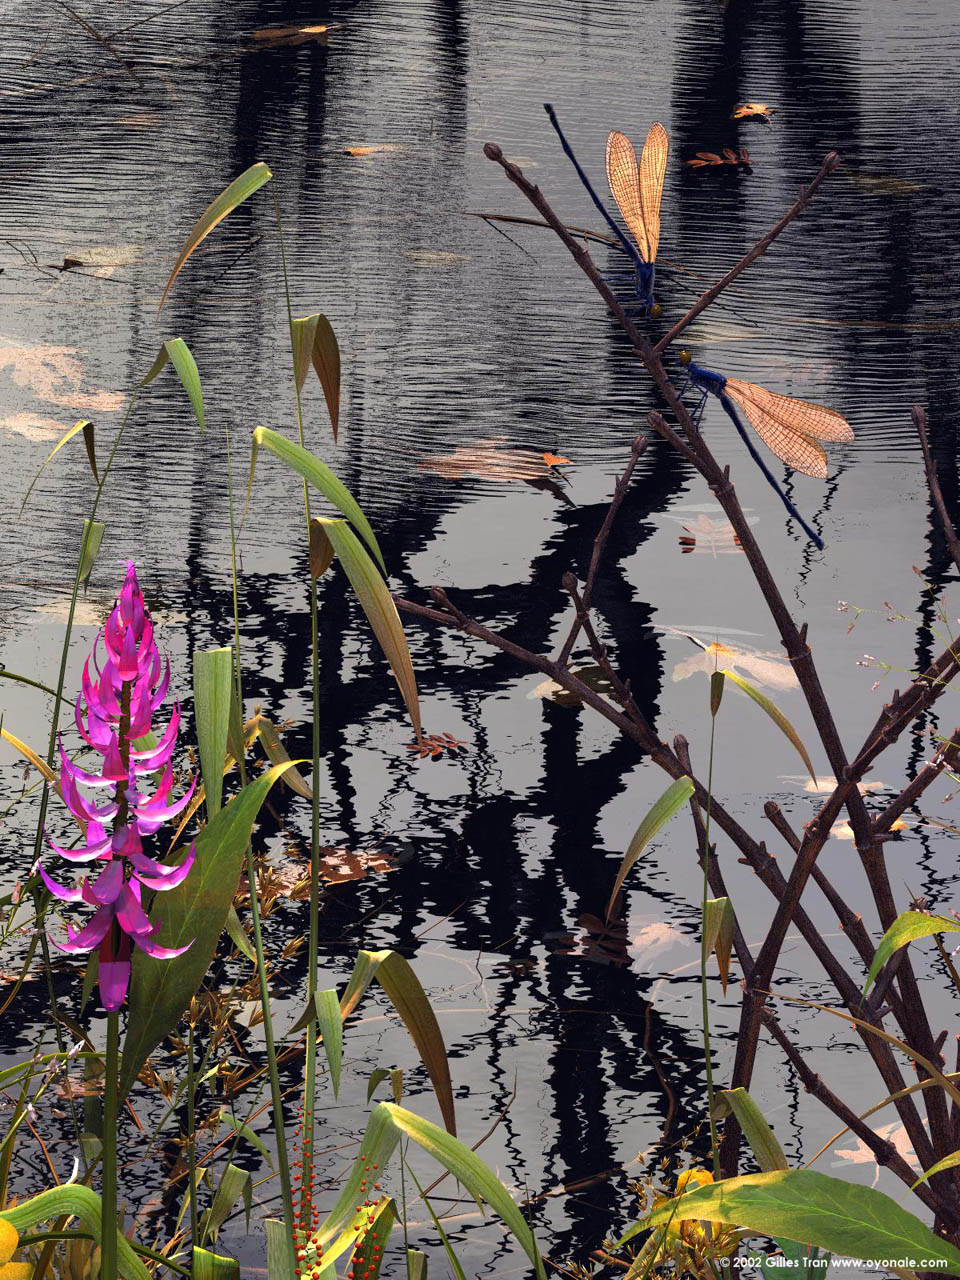
The first zone is a close-up of the main tree itself. The second zone shows the various small models that populate the bottom part of the image: the plants, but also the two dragonflies that are almost invisible in the 960 x 1280 view.

Of course it may not be possible to render an entire image at such a large size in the time you have available, and in that case POV-Ray can be used to generate the zoomed-in portions using the +SC, +SR, +EC and +ER switches (or their INI equivalents). The next example shows how to calculate the parameters needed to generate these switch values for detail #1 given the above example image.


  Parameter calculation example  

In the above example, detail #1 occupies the area 424,328 to 615,583 in the 960x1280 image. This equates to +SC0.441667, +EC0.640625, +SR0.25625 and +ER0.455469. These values are simply arrived at by dividing the desired column by the width (e.g. 424/960) or the row by the height (e.g. 328/1280). These won't necessarily always equate to the exact pixel you want but it will be close enough for the purposes of the submission.

If we just use the above calculations (i.e. you are generating a zoomed-in image that represents 1/25th of the image area of the original image - remember you can of course make it more detailed than this), then the portion of the image rendered by the above parameters must be the same size as your original image. This means that the output image size you provide to POV-Ray must contain 25 times the number of pixels in the original. Using the shortcut calculation this means the width and height must be multiplied by 5, so in this example you would perform a render that was 4800x6400 pixels in size.

Once you have a completed render using the above method, you will need to load it into a suitable image editing program to crop out the 960x1280 area of interest.

There is also a zoomin include file that may be of use to some people. It only works with the perspective camera, so your mileage may vary.


  Creating a signature image with POV-Ray  

The POVCOMP competition rules allow you to submit a separate signature image that is to be applied to your image after judging. This image has to be a PNG image with alpha channel of the same size as the main image. You can create such an image with most imaging programs but you can also use POV-Ray to generate it.

Here is a simple example how to do this. Feel free to use this code or to modify it for creating your own signature image. To render it with alpha channel make sure you use the following render options:

+fn +ua

The scene file: signature.pov

Rendering this scene results in the following image (note not all browsers correctly display PNG images with alpha channel):

signature.pov render

Applied to a picture this looks like:

signature applied


Copyright 2003-2004 Persistence of Vision Raytracer Pty. Ltd.